How to use Syncthing with Paperless
-
Hi,
I am new to Syncthing. With this post I want to describe how to use Syncthing with Paperless-ngx, a Mac and an iPhone.
First of all:
Install paperless-ngx, Syncthing and Nextcloud via Cloudron.
After installation you have to add a local volume mount which can be shared between paperless, Syncthing and Nextcloud. Therefore go to the local e.g. media foldercd mediaand create a folder:
mkdir paperless-shareset permissions to 777 so every connected app can work with it properly:
chmod 777 -R paperless-shareAfterwards go to:
https://my.yourcloudron.xx/#/volumes and a new volume with "Add Volume":
Name: e.g. "Paperless-Share"
Mount Type: File System
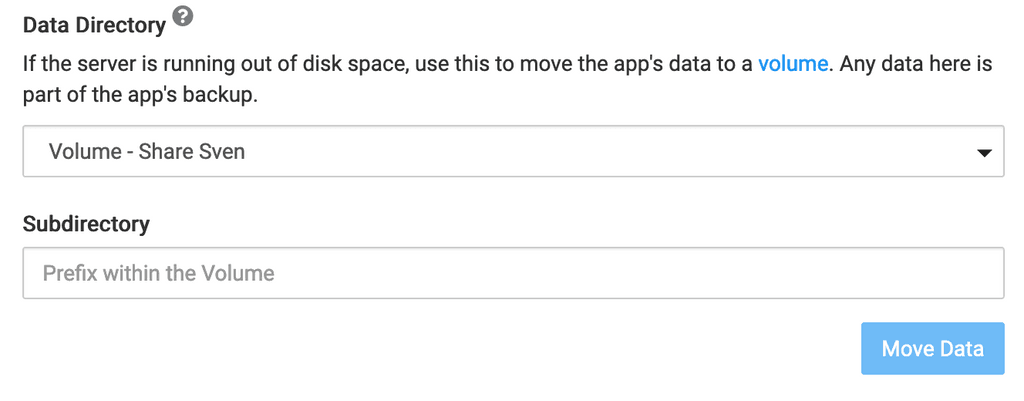
Local directory: /media/paperless-shareGo to your Paperless settings under storage and change the Data directory to "Paperless-Share". Save and the app will restart automatically.
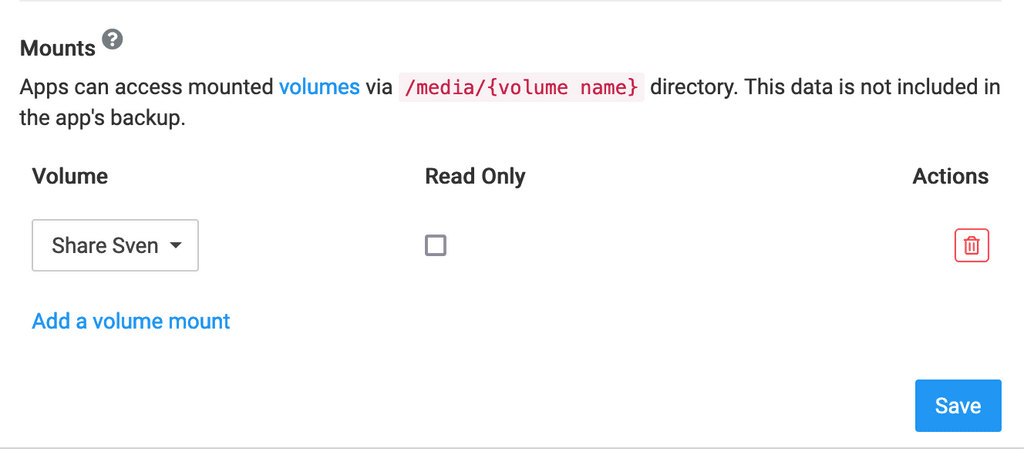
Afterwards go to Sync and Nextcloud and add your new Volume under storage settings under Mounts and tick off Read Only:
Configure Syncting by adding a new folder and point it to the correct Paperless directory in your new local volume:
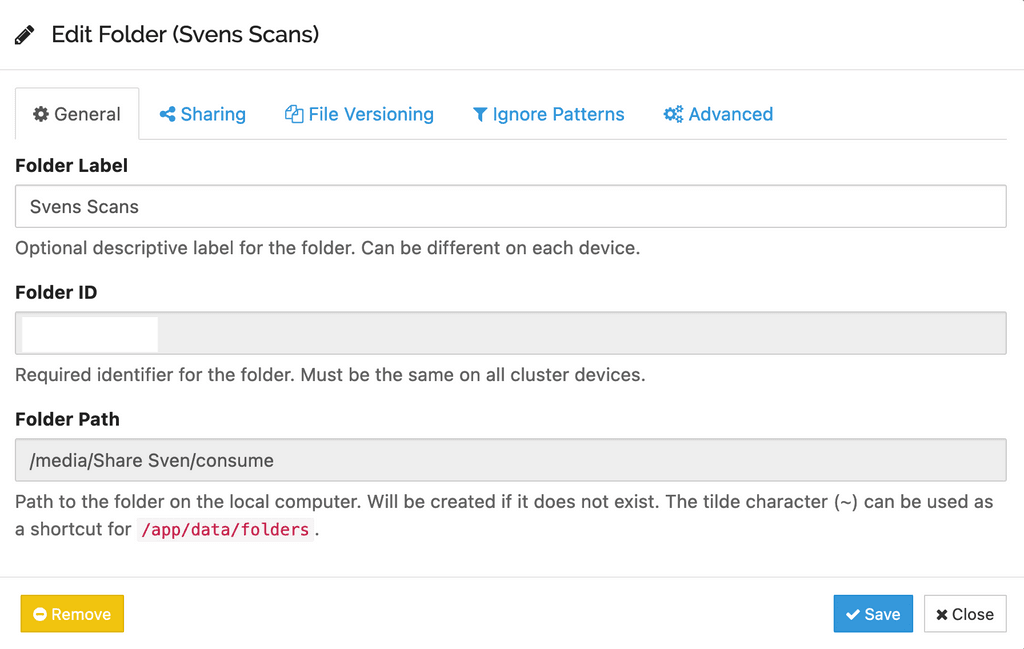
By adding this share to your local Mac Syncthing you should be able to drop files to this local directory which will be synced to the consume folder of Paperless and processed in Paperless.
On my iPhone I am using Genius Scan. They only support exports by FTP (and not SFTP) and WebDav. That's why I had to use my Nextcloud as WebDav Server which uses my local volume as external storage. Therefor just install the App "External storage support". Afterwards you can add your Cloudron Volume via the Nextcloud Admin app settings:
Name: Paperless Share
external storage: local
configuration: /media/Paperless-share/
activate sharing
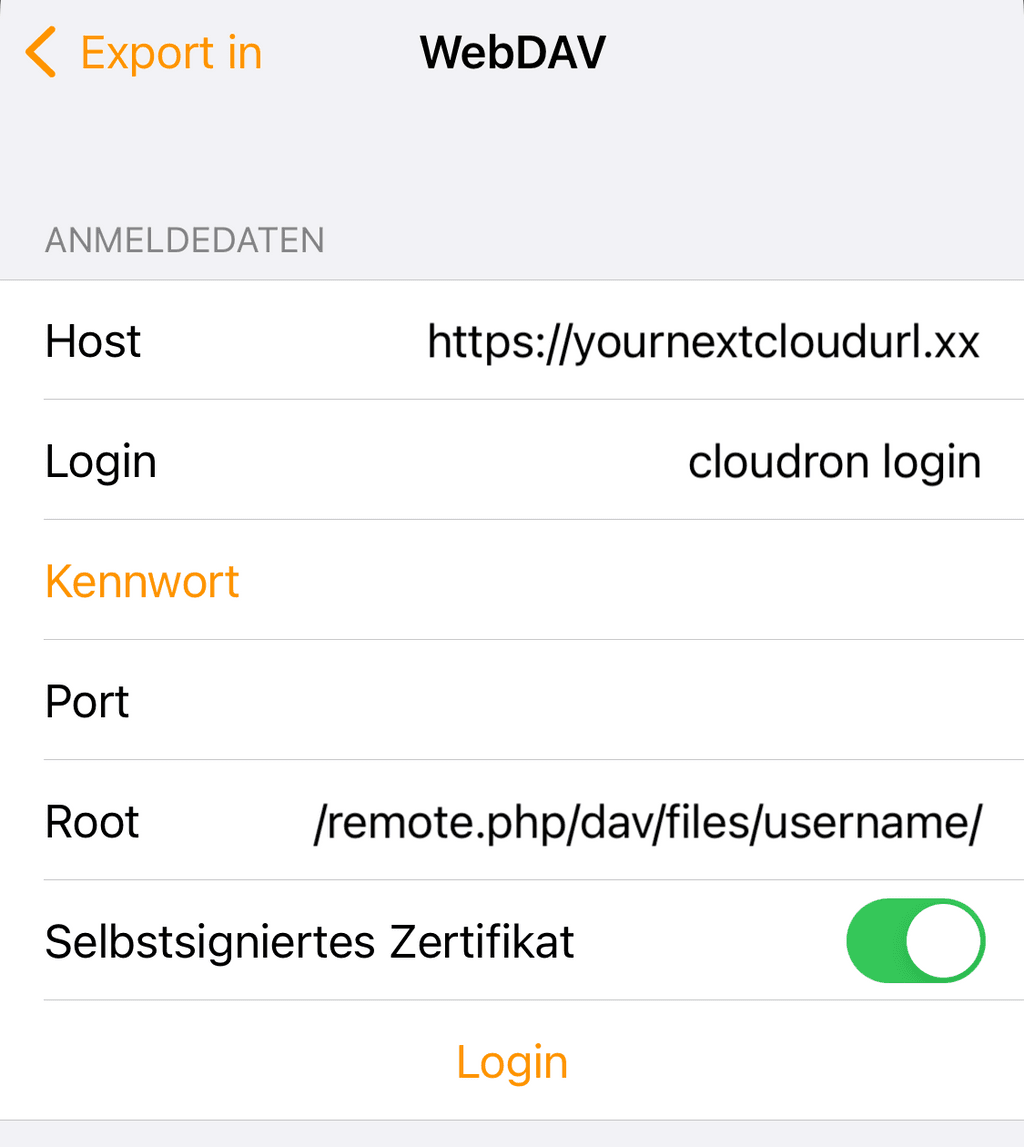
activate previewNow go to your Genius Scan App settings and add your Nextcloud WebDav credentials
And that's it. You are now able to send documents to your Paperless from your iPhone and Mac.
Looking forward to your feedback and possible other (more secure) solutions.
BTW I am using a ScanSnap ix1500 at home to scan to my local Mac folder.
Best,
Sven