Dify.ai, a self-hosted prompt-management tool
-
via ai:
"Importance of AI Prompt Management:
Consistency: Ensures consistent outputs across multiple interactions or users.
Efficiency: Saves time by reusing and refining effective prompts.
Performance optimization: Helps in fine-tuning prompts for better results.
Collaboration: Enables teams to share and improve prompts collectively.
Version control: Tracks changes and improvements in prompts over time.
Compliance: Helps maintain adherence to guidelines and ethical standards.Issues in Prompt Management:
Versioning: Keeping track of different prompt versions and their effectiveness.
Organization: Managing a large number of prompts across various projects or use cases.
Sharing: Efficiently sharing prompts among team members or across departments.
Testing: Systematically testing and comparing different prompt variations.
Documentation: Maintaining clear records of prompt purposes, contexts, and performance.
Security: Ensuring sensitive prompts are not exposed to unauthorized users.
Scalability: Managing prompts as the number of AI applications and users grows.How dify.ai can help:
Centralized repository: Provides a single location to store and organize all prompts.
Version control: Tracks changes to prompts over time, allowing for easy rollbacks if needed.
Collaboration features: Enables team members to work together on prompt development and refinement.
Testing and optimization: Offers tools to systematically test and compare different prompt versions.
Integration capabilities: Can potentially integrate with various AI models and platforms for seamless workflow.
User management: Allows for access control and permission settings for different team members.
Analytics: Provides insights into prompt performance and usage patterns.
Templating: Offers reusable prompt templates to maintain consistency across similar use cases.
API access: Likely provides API endpoints for programmatic access to prompts in applications.
Documentation: Facilitates adding context, notes, and performance data to each prompt.
" -
@zonzonzon er, you didn't vote
-
For folks who need to self host this app, I created a comprehensive tutorial.
Create a fresh server, update and upgrade the system, install docker and docker compose with this one command.
sudo apt-get update -y &&
sudo apt-get upgrade -y &&
sudo apt-get install -y apt-transport-https ca-certificates curl software-properties-common gnupg lsb-release &&
curl -fsSL https://download.docker.com/linux/ubuntu/gpg | sudo gpg --dearmor -o /usr/share/keyrings/docker-archive-keyring.gpg &&
echo "deb [arch=$(dpkg --print-architecture) signed-by=/usr/share/keyrings/docker-archive-keyring.gpg] https://download.docker.com/linux/ubuntu $(lsb_release -cs) stable" | sudo tee /etc/apt/sources.list.d/docker.list > /dev/null &&
sudo apt-get update -y &&
sudo apt-get install -y docker-ce &&
sudo usermod -aG docker $USER &&
sudo curl -L https://github.com/docker/compose/releases/download/v2.26.1/docker-compose-`uname -s-uname -m` -o /usr/local/bin/docker-compose &&
sudo chmod +x /usr/local/bin/docker-compose && \Clone the Repo
git clone https://github.com/langgenius/dify.git
Customize the .env file
cd dify/docker
cp .env.example .envI only customized the following variables.
APP_WEB_URL=your_domain_name
NGINX_HTTPS_ENABLED=true
NGINX_SSL_CERT_FILENAME=cert.pem
NGINX_SSL_CERT_KEY_FILENAME=key.pemCtrl S to save, Ctrl X to exit the nano editor.
cd -Create SSL Certificate
Create ssl certificate at Cloudflare (open SSL/TSL tab and open Original Server)
nano dify/docker/nginx/ssl/cert.pem
Copy and paste the Cloudflare certificate, then Ctrl S, Ctrl Xnano dify/docker/nginx/ssl/key.pem
Copy and paste the Cloudflare SSL key, then Ctrl S, Ctrl XDeploy
cd dify/docker
docker compose up -dUpgrade
cd dify/docker
docker compose down
git pull origin main
docker compose pull
docker compose up -dSetting Up Automated Backups for Dify Using Restic and Cloudflare R2
Step 1: Install Restic
- Connect to your server via SSH.
- Update your package list and install Restic:
sudo apt update
sudo apt install restic
Step 2: Prepare Your Cloudflare R2 Bucket
- Create a new R2 bucket in your Cloudflare account if you haven't already.
- Note down the following information from your Cloudflare R2 setup:
- Bucket name
- Access Key ID
- Secret Access Key
- R2 Endpoint URL
Step 3: Create the Backup Script
-
Create a new directory for the Restic script:
mkdir -p /root/restic -
Create and open the backup script using nano:
nano /root/restic/backup.sh -
Copy and paste the following content into the file:
#!/bin/bash # Set environment variables for Restic export RESTIC_REPOSITORY="s3:YOUR_R2_ENDPOINT_URL/YOUR_BUCKET_NAME" export AWS_ACCESS_KEY_ID="YOUR_ACCESS_KEY_ID" export AWS_SECRET_ACCESS_KEY="YOUR_SECRET_ACCESS_KEY" # Set the backup source BACKUP_SOURCE="/root/dify/docker/volumes" # Perform the backup restic backup $BACKUP_SOURCE # Prune old snapshots (keep last 7 daily, last 4 weekly, and last 12 monthly backups) restic forget --keep-daily 7 --keep-weekly 4 --keep-monthly 12 --prune # Check the repository for errors restic check -
Replace the following placeholders with your actual Cloudflare R2 information:
YOUR_R2_ENDPOINT_URL: Your Cloudflare R2 endpoint URLYOUR_BUCKET_NAME: Your R2 bucket nameYOUR_ACCESS_KEY_ID: Your R2 Access Key IDYOUR_SECRET_ACCESS_KEY: Your R2 Secret Access Key
-
Save the file and exit nano:
- Press
Ctrl + X - When prompted to save, press
Y - Press
Enterto confirm the file name
- Press
-
Make the script executable:
chmod +x /root/restic/backup.sh -
Secure the script (as it contains sensitive information):
chmod 700 /root/restic/backup.sh
Step 4: Initialize the Restic Repository
-
Set the environment variables (replace with your actual R2 information):
export RESTIC_REPOSITORY="s3:YOUR_R2_ENDPOINT_URL/YOUR_BUCKET_NAME" export AWS_ACCESS_KEY_ID="YOUR_ACCESS_KEY_ID" export AWS_SECRET_ACCESS_KEY="YOUR_SECRET_ACCESS_KEY" -
Initialize the Restic repository:
restic init
Step 5: Set Up Daily Backups
-
Open the crontab file:
crontab -e -
If prompted to select an editor, choose nano by entering the corresponding number.
-
Add the following line at the end of the file to run the backup daily at 3 AM:
0 3 * * * /root/restic/backup.sh > /root/restic/backup.log 2>&1 -
Save the file and exit nano:
- Press
Ctrl + X - When prompted to save, press
Y - Press
Enterto confirm
- Press
Verifying the Setup
To ensure everything is set up correctly:
-
Run the backup script manually:
/root/restic/backup.sh -
Check the Restic repository for snapshots:
restic snapshots
Restoring from a Backup
To restore your data:
-
List available snapshots:
restic snapshots -
Restore the latest snapshot:
restic restore latest --target /path/to/restoreReplace
/path/to/restorewith the directory where you want to restore the data.
Done.
-
Started a packaging attempt ...
-
V0.0.1 installed on my Cloudron
Couple issues to resolve.
But
-
Released v0.0.2 of my cloudron-dify package.
Available on
CustomAppGatewayand/or your ownCCAI-Papp, if installed. Or one-liner installation :
curl -fsSL https://customappgateway.appx.uk/install.sh | bash -s -- --install-app "dify"Still early days on cloudron deployment, but releasing it so early-adopters can help flush out issues.
It's a large docker image, so be patient with installation.
issues :
- need to check email setup
- need to actually use it !
- Investigating the connection to Dify Marketplace (seems off)
-
released v0.0.6
plugin installation fixed for installing from local (just download from marketplace and then install the local plugin package file)Investigating the direct marketplace link
-
@timconsidine Have you ever built a knowledge base? All my files are stuck in some kind of queue. They never get processed.
Pronouns: he/him | Primary language: German
-
@timconsidine Have you ever built a knowledge base? All my files are stuck in some kind of queue. They never get processed.
-
@timconsidine Have you ever built a knowledge base? All my files are stuck in some kind of queue. They never get processed.
-
@luckow
I pushed v0.0.23 to git repo
 marketplace access and install
my cloudron hosted ollama set as model provider (needs open-ai-compatible plugin)
set my Ollama for nomic-text-embed
created knowledge with a single document

 doc stuck in queue
Investigating ....
-
@timconsidine Have you ever built a knowledge base? All my files are stuck in some kind of queue. They never get processed.
@luckow
Think I have resolved knowledge import / indexing
Not tested heavily but I got a single 1Mb PDF through the process.Pushed 0.0.24 to GitHub
Also created new docker image :
tcmbp132021/cloudron-dify:v0.0.24 (or :latest)
Still working on a fix to sandbox for workflows but best to get the knowledge RAG out in the wild for additional testing.
-
Sandbox issue resolved
Pushed v0.0.25
tcmbp132021/cloudron-dify:v0.0.25 (or :latest)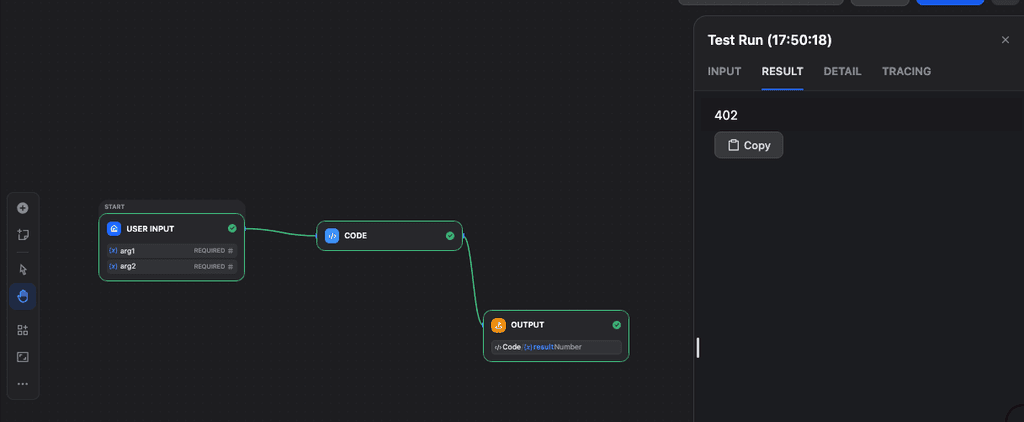
More real-world testing needed, but hopefully we're making progress towards a v1.0.0 release
Install via 1 line install :
curl -fsSL https://customappgateway.appx.uk/install.sh | bash -s -- --install-app "dify" -
Added Playwright to the build (so playwright plugin can be used : needs URI in plugin config of
ws://localhost:3003)pushed v0.0.28
tcmbp132021/cloudron-dify:v0.0.28 (or :latest)Indie app dev, huge fan of Cloudron PaaS, scratching my itches : communityapps.appx.uk
-
Added Playwright to the build (so playwright plugin can be used : needs URI in plugin config of
ws://localhost:3003)pushed v0.0.28
tcmbp132021/cloudron-dify:v0.0.28 (or :latest)@timconsidine will look into it later.
-
Added Playwright to the build (so playwright plugin can be used : needs URI in plugin config of
ws://localhost:3003)pushed v0.0.28
tcmbp132021/cloudron-dify:v0.0.28 (or :latest)@timconsidine anything wrong on my side?
Installing App to diffy.example.org ...
Image: tcmbp132021/cloudron-dify:latest
✘ Installation failed: No such route
Details: {
  "status": "Not Found",
  "message": "No such route"
}
This it the output of
curl -fsSL https://customappgateway.appx.uk/install.sh | bash -s -- --install-app "Dify AI"but same error from insie CCAI-PPronouns: he/him | Primary language: German
-
@timconsidine anything wrong on my side?
Installing App to diffy.example.org ...
Image: tcmbp132021/cloudron-dify:latest
✘ Installation failed: No such route
Details: {
  "status": "Not Found",
  "message": "No such route"
}
This it the output of
curl -fsSL https://customappgateway.appx.uk/install.sh | bash -s -- --install-app "Dify AI"but same error from insie CCAI-P
")
Hello! It looks like you're interested in this conversation, but you don't have an account yet.
Getting fed up of having to scroll through the same posts each visit? When you register for an account, you'll always come back to exactly where you were before, and choose to be notified of new replies (either via email, or push notification). You'll also be able to save bookmarks and upvote posts to show your appreciation to other community members.
With your input, this post could be even better 💗
Register Login