Essentially this would allow one to run and host their own Firefox Authentication and Sync server (Sync Bookmarks, passwords, history, etc from the browser to a self-hosted server)
Links:
Would anyone be interested in using such an app?
Essentially this would allow one to run and host their own Firefox Authentication and Sync server (Sync Bookmarks, passwords, history, etc from the browser to a self-hosted server)
Links:
Would anyone be interested in using such an app?
How to build apps for Cloudron using VirtualBox (or VMWare Workstation, Hyper-V may or may not work here). This tutorial will follow the Cloudron Tutorial HOWEVER it will use a pre-built VM and some tweaks to building the app packages.
This will allow you to build apps on Mac and Windows without installing node, docker, etc. Edit: You can also use VirtualBox on Linux or just straight install docker, nodejs, and cloudron-cli to do the same
(Mega.nz was used as its a VERY fast download for free users. If mega does not work for you, PM me and we can P2P the OVA.)
Go into your downloads folder and double click the vbox-extension pack you downloaded from the getting started section. This will launch VirtualBox and ask if you want to install the extension. Click "Yes" and "I Accept".
Open VirtualBox, then go to File -> Import Appliance. Select the OVA file you downloaded above. You should now see the details of the VM - you will be able to change settings after the import is done. So click "Next" and allow the import to finish.
Once the import is completed, you will see a new VM in VirtualBox called "Cloudron-DEV". You may modify the settings from this point, however I do recommend what I put in the config. Adding more resources never hurt though
As a note, under the Network config for the VM you will see 2 port forwards. Port 2222 (SSH) and port 9000 (Portainer). These ports will be used by us later in the tutorial. If you change the networking mode from NAT to Bridge so you can a local IP that matches your current LAN you will need to note that IP and use that instead of "localhost" later in the tutorial.
Open up Visual Studio Code and install Remote Development Extension. This will allow us to explore the VMs filesystem.
Let's Start the VM - To start, I recommend either just pressing "Start" or if you are a cool-cat you can headless start it (Right click the VM -> Start -> Headless Start") this will allow the VM to run in the background and will NOT produce a window for you to interact with. This will NOT persist across host reboots unless specially config'ed (not covered here!)
Open up PowerShell (Or terminal if on Mac) and let's SSH into the VM so we can change the default password (VERY IMPORTANT!) In the terminal type: ssh dev@localhost -p 2222
, accept the SSH certificate, then put in the password "password". Once logged in, type passwd
. Change your password following the prompts. Remember this password - it will be needed for VSCode later! (And for troubleshooting issues if any arise.) We also need to regenerate SSH Keys (For your own security!):
sudo rm -v /etc/ssh/ssh_host_*
sudo dpkg-reconfigure openssh-server
sudo systemctl restart ssh
Now in Visual Studio Code, on the left bar, go to Remote Explorer, then make a new SSH Connection Target. Now VSCode will walk you through setup of the remote explorer. The first prompt is the host string, this is dev@localhost -p 2222
.(Please note the lower-case "p"!) Since we are using NAT as a simple config for the VM, ports are forwarded to the host for simplicity. In this case SSH is forwarded to port 2222. So, connecting to localhost port 2222 will actually be the Virtual Machine.
Once saved, you will see a new ssh target "localhost" in VSCode. Right click on it, and select "Connect in current window". Give it a few seconds and it will prompt for your password. You may be prompted for other information here like the type of OS used - make sure to select Linux.
Great! Now you are connected to the VM. In the explorer tab in the left bar (Not remote explorer) it should say "Connected to remote". Now, we need to click the button that says "Open folder". A prompt will come up asking which folder to open. I would just press "OK" and let it open /home/dev
as that is the home dir for the dev user and you have full permissions there as that user. Put your password in once more and now you should see a small folder structure and EXAMPLE app "tutorial-php-app".
You should note, a terminal can also be opened by going to the Terminal menu -> New Terminal. This gives you ssh access to a text terminal on the server to run commands (like building an app!)
Let's open up a terminal by going to the Terminal menu -> New Terminal. This will open at the bottom of VSCode. Let's login to the cloudron instance of choice and docker hub:
cloudron login
and follow the prompts.docker login
and follow the prompts.Once logged into the above, you can start building and deploying apps on your cloudron instance! Explore the tutorial php app (you can git clone more into the VM too, just put the app folders in separate repos.)
The build process is pretty simple:
cd path-to-app
docker build -t <dockerHubUsername>/<packageName>:latest . --no-cache
(Note, the rogue looking period is short for "current directory" and docker will use the current directory to build the container.docker build -t murgero/org.urgero.someApp:latest . --no-cache
docker push <dockerHubUsername>/<packageName>:latest
docker push murgero/org.urgero.someApp:latest
cloudron install --image=<dockerHubUsername>/<packageName>:latest
cloudron install --image=murgero/org.urgero.someApp:latest
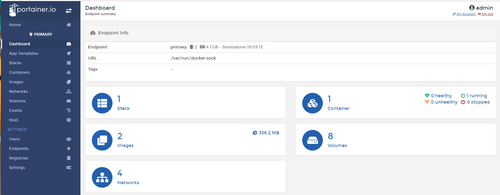
Portainer is available to assist in cleaning the VM of docker images and pulling images and spinning up docker containers as well. It's a WebUI for Docker essentially. It's running by default.
Open your browser to http://localhost:9000. It will run the the setup - other than the password, I would just choose defaults here.
apt update && apt upgrade -y
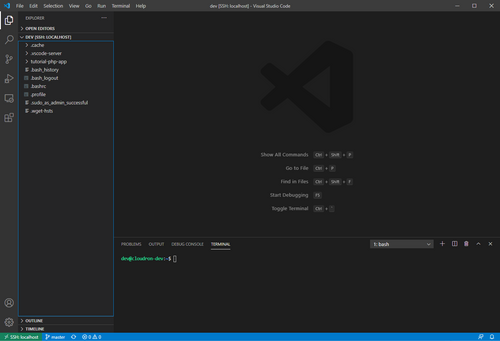
every week or so to get the latest security patches.This is what it all looks like once you complete the above steps, you will get a file explorer and ssh terminal along with a code-editor to modify and build cloudron apps! Portainer as well for managing the docker daemon (mainly for cleaning up easily)
I wrote a probably poorly written Cloudron review on my site, if anyone wants to read - new users welcome too!!
https://www.asterisk.org/
https://www.freepbx.org/
Asterisk is an open source PBX. (A PBX (private branch exchange) is a telephone system within an enterprise that switches calls between enterprise users on local lines while allowing all users to share a certain number of external phone lines.)
FreePBX is a Web interface to manage PBX.
Would be interesting to see if this could be done??
EDIT: Looks like someone has already put it on the wishlist: https://forum.cloudron.io/topic/1133/asterisk-pbx-open-source-voip-ip-pbx-server
Am I allowed to tease a potential upcoming custom app on this????
5/29/2020: As of this edit, I believe @doodlemania2's package might be a better option for most (unless you REALLY feel like using the LAMP app for like development of Pixelfed or something)
Link to @doodlemania2's app package repo Just install with Cloudron CLI
I am keeping this post unchanged otherwise for informational purposes, but please note the above. Thank you!
Pixelfed is A free and ethical photo sharing platform, powered by ActivityPub federation. This means posts, comments, etc are feature-compatible with Mastodon, GNU/Social, Pleroma, and other ActivityPub servers!
Site: https://pixelfed.org/
This is a step by step guide getting PixelFed working in the LAMP app. This will be useful for those that want an ActivityPub server but don't want to use Nextcloud.
The following is a literal step by step guide. Please be mindful when copying & pasting terminal commands.
Step One
Install the LAMP app to the domain of choice. I recommend using the root of a domain (IE not using a subdomain) but subdomain installs are supported.
Step Two
2. Let's clone the PixelFed repo into the app, open up the Debug -> Terminal settings for the LAMP app you just installed. Some of the following wont make much sense, but trust me when I say the way we are installing is probably the best way without making a whole new app for this.
cd /app/data
git clone -b dev https://github.com/pixelfed/pixelfed.git pixelfed
Now we need to move the current public folder, then copy the data from pixelfed into the /app/data folder (just copy and paste these bits, it's easier that way)
cd /app/data
mv public public-original
## These two commands just move the contents of the pixelfed folder up one directory.
cd /app/data/pixelfed
find . -maxdepth 1 -exec mv {} .. \;
cd /app/data
rmdir pixelfed
Step Three
Time to install the PHP dependencies. This will likely take a few minutes. If you are using a smaller VPS please allow at least 15 minutes before killing the process.
composer install --no-ansi --no-interaction --optimize-autoloader
Step Four
Let's make sure permissions are good.
chown -R www-data:www-data /app/data
find . -type d -exec chmod 755 {} \; # set all directories to rwx by user/group
find . -type f -exec chmod 644 {} \;
Step Five
Let's copy the generic config, and modify it:
cp .env.example .env
Once you copied the .env file, open it up and modify the following bits to match your environment, note: Only change these bits unless you know what you are doing! The "..." signifies some scrolling between variables. Also note, you can find credentials for the LAMP app's DB, mail, and redis queue in credentials.txt
in the /app/data
folder.
APP_NAME="Pixelfed Prod"
...
APP_URL=http://localhost
APP_DOMAIN="localhost"
ADMIN_DOMAIN="localhost"
SESSION_DOMAIN="localhost"
...
DB_HOST=127.0.0.1
DB_DATABASE=pixelfed
DB_USERNAME=pixelfed
DB_PASSWORD=pixelfed
...
REDIS_HOST=127.0.0.1
REDIS_PASSWORD=null
...
MAIL_HOST=smtp.mailtrap.io
MAIL_PORT=2525
MAIL_USERNAME=null
MAIL_PASSWORD=null
MAIL_ENCRYPTION=null
MAIL_FROM_ADDRESS="pixelfed@example.com"
MAIL_FROM_NAME="Pixelfed"
...
## Change these to 'true' (no quotes)
## If you want to activate ActivityPub
## (The Mastodon, Pleroma, etc protocol)
ACTIVITY_PUB=false
AP_REMOTE_FOLLOW=false
AP_INBOX=false
Note:
After you register your account(s) you can disable registration by making OPEN_REGISTRATION=true
equal to OPEN_REGISTRATION=false
Step Six
Now we need to initialize the Database, cache, and routes:
cd /app/data
## Generate the security key:
php artisan key:generate
## Cache configuration variables (run this command everytime you change the .env file!)
php artisan config:cache
## Link storage folder:
php artisan storage:link
## Only really needs to be ran once, but may need to be ran on updates:
## This sets up the database
php artisan migrate --force
## Setup Horizon dashboard for Admins (to see the PHP queue)
php artisan horizon:install
php artisan horizon:assets
## Cache routes
php artisan route:cache
Step Seven
Let's configure run.sh to start the Horizon service in the background as a job (since we can't really use systemd here)
Edit /app/data/run.sh
and add to it at the bottom:
cd /app/data
php artisan config:cache
## php artisan migrate --force
php artisan route:cache
php artisan horizon &
This will start the horizon service after caching routes and configs. Restart the app after you change the .env
file, or if the Horizon service stops for some reason.
Step Eight (Finale!)
Now, go to the URL for your app and you should see:
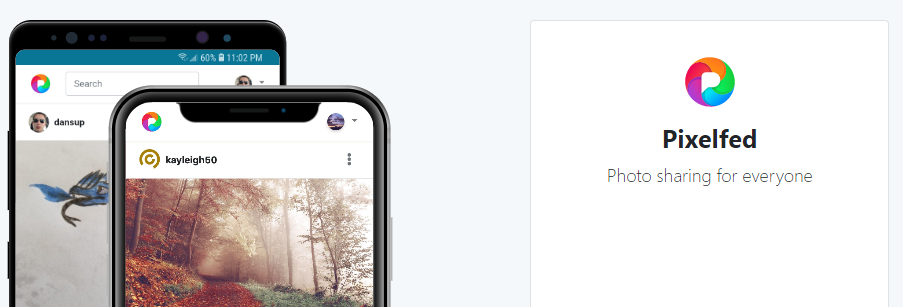
Note: your /app/data
folder should look like this (give or take)(cd /app/data && ls -a
) :
Let's make your admin account! (Used for moderation, and configuration of the server once it is live.)
Register an account in your new Pixelfed server. Make sure to verify the email (If you did not get an email, we cna change that manually in the DB!)
Login to https://APP_URL/phpmyadmin using the phpmyadmin_login.txt
file for the credentials.
Go into the database and then select the Users table. Find your user (should be EASY) and copy the created date to the email verified column if needed, then change the is_admin from 0 to 1:
Logout of Pixelfed and log back in and you will be an admin with a verified email!
This should cover the whole installation of Pixelfed. Let me know if I missed anything or if there are issues with any of the above. Thanks!!
@murgero This will be updated later this afternoon and put into a public repo for all to try.
@doodlemania2 Thankfully - I was sponsored to get the app created
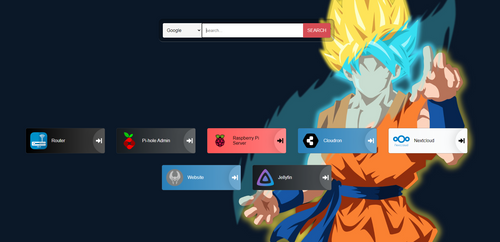
Is this project similar to Heimdall? It's what I am currently using as a dashboard (Currently Personal, but it is hosted on my Cloudron and displaying some custom links and apps)
@nebulon Yeah, I wrote this pretty exhausted. That said I could probably rewrite it sometime in the coming weeks. Basically, I made the VM because it's what I use to develop apps for Cloudron - and the OVA is nice cause I rebuild my computer every so often and kinda tired of rebuilding it over and over again. Figured if I did this, and wrote a quick tutorial on it, it could benefit everyone
@will If you look at my thread history, you will find a tutorial on how to install this on the LAMP app for use right now in Cloudron
Edit: here is the tutorial: https://forum.cloudron.io/post/5246
@jdaviescoates If you would like, we can discuss this in a PM? I'd be more than happy to build a portal for your users to register at.
In case you would like it, I just made a tutorial on installing Pixelfed to the LAMP app:
https://forum.cloudron.io/topic/2058/installing-pixelfed-in-the-lamp-app-properly-well-enough
@girish Beautiful I'll get tests going for Directus then. Since I am being paid for it's packaging.
I built a beta build for this, it can be installed using:
cloudron install --image mitchellurgero/org.urgero.codeserver:0.0.2
Check post install information for details!!! Do not run on production system, etc etc.
Edit 1:
GitHub Link: https://github.com/mitchellurgero/cloudron-vscode
Docker-Hub Link: https://cloud.docker.com/u/mitchellurgero/repository/docker/mitchellurgero/org.urgero.codeserver
@humptydumpty This is probably the wrong place to ask that question since that would likely be specific to freescout. You may want to read their help documentation for more info:
https://docs.helpscout.com/article/696-manage-help-scout-notifications#enable
@ei8fdb These apps are mostly unmodified versions of ones you would get from the developers of said apps. You shouldn't have any issues exporting a DB, moving the DB and files over to a new instance (outside of Cloudron) and grabbing data you need.
Speaking of Nextcloud specifically, you can move the DB and files + the config with little issue if you needed to, but I don't think you'd want to after moving to Cloudron, it's that good.
I've been using it since version 3.x and I gotta say I've never used a system like it - It rocks. I've tried Mailcow+Portainer, Mailinabox, I've even self-hosted with just straight up ubuntu + Apache (manually installing and managing), but Cloudron takes the cake. We even have a LAMP app that can host PHP, nodejs, etc apps that aren't otherwise supported.
I'd like to propose OpenLDAP (Or LDAP base Alternative) to allow apps to use an LDAP database without require access to Cloudron's LDAP server. This can be used in cases of of security, or in the case of web hosting, allowing apps to not cross talk on LDAP.
Here it is: https://github.com/mitchellurgero/cloudron-vscode-package
Just clone the repo, then install:
cloudron install --image=mitchellurgero/org.urgero.vslamp:latest