There are different approaches to this. This is one way based on another Hugo CMS post here -- I hope it helps someone!
On your local machine, you'll need to install first:
- Git (https://git-scm.com/downloads)
- Hugo (https://gohugo.io/getting-started/installing/)
- Yes, and create a GitLab account!
Note: You will need to use a Cloudron or other self hosted gitlab instance. The Surfer and GitLab apps are both available on Cloudron. You would need to host your own gitlab-runner for this to work.
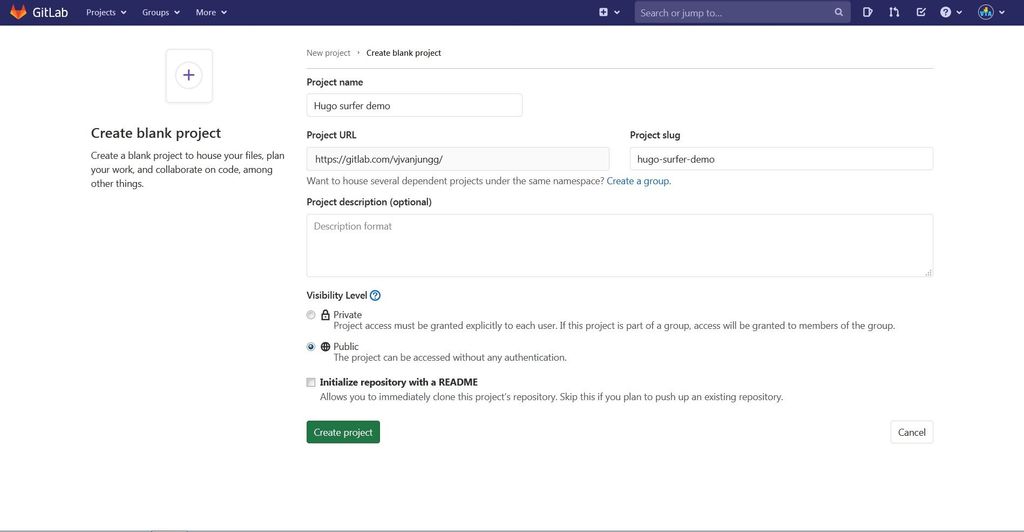
After creating a GitLab account, you can log in to create a Blank project like this:
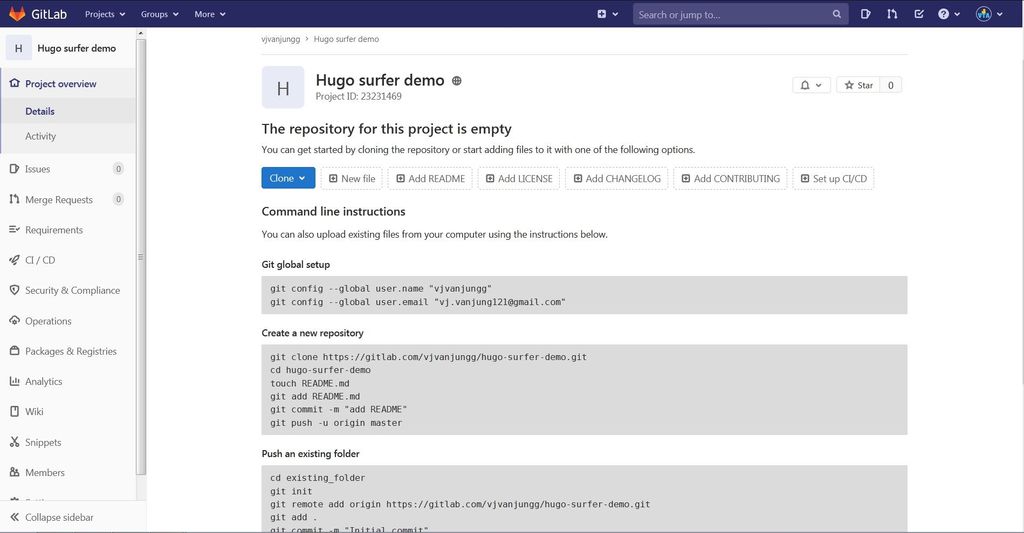
It should look like this after the project has been created:
To verify your Git & Hugo install on the local machine, you can run in your Mac Terminal/Windows cmd:
git --version
hugo version
From here we can begin the fun part. All the commands needed are below. I have taken the screenshots of command by command.
You can copy/paste and hit Enter/Return in your Terminal for each one to run and see the results.
Remember to change the link to your GitLab project in the line beginning with git remote add below. We start with this line:
hugo new site quickstart
cd quickstart
git init
git remote add origin https://gitlab.com/vjvanjungg/hugo-surfer-demo.git
git submodule add https://github.com/budparr/gohugo-theme-ananke.git themes/ananke
echo theme = "ananke" >> config.toml
hugo new posts/my-first-post.md
hugo -D
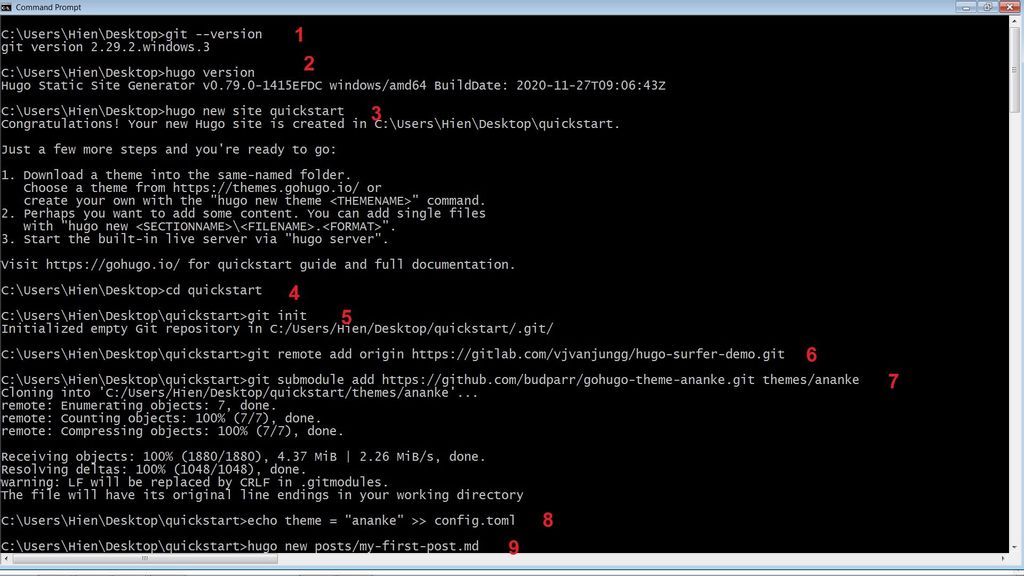
Then, at command #11 if you're using Visual Studio Code or any other code editor you like, open it up to add a new file called .gitlab-ci.yml:
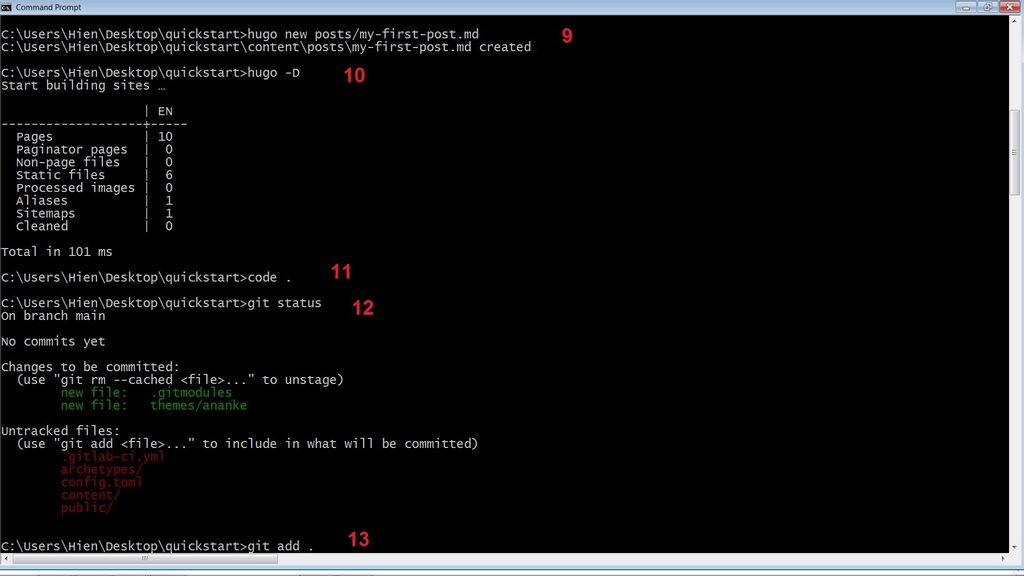
Adding .gitlab-ci.yml:
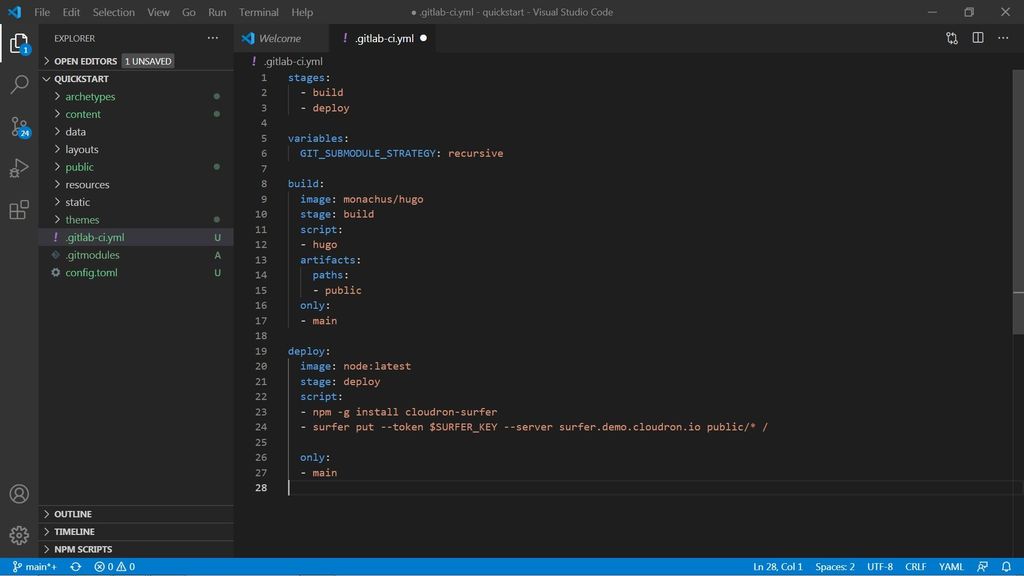
The content of the file .gitlab-ci.yml is as follows. If you're hosting Surfer at a different url, remember to change it from surfer.demo.cloudron.io below to your url.
stages:
  - build
  - deploy

variables:
  GIT_SUBMODULE_STRATEGY: recursive

build:
  image: monachus/hugo
  stage: build
  script:
  - hugo
  artifacts:
    paths:
    - public
  only:
  - main

deploy:
  image: node:latest
  stage: deploy
  script:
  - npm -g install cloudron-surfer
  - surfer put --token $SURFER_KEY --server surfer.demo.cloudron.io public/* /

  only:
  - main
After this, get the access token from Surfer:
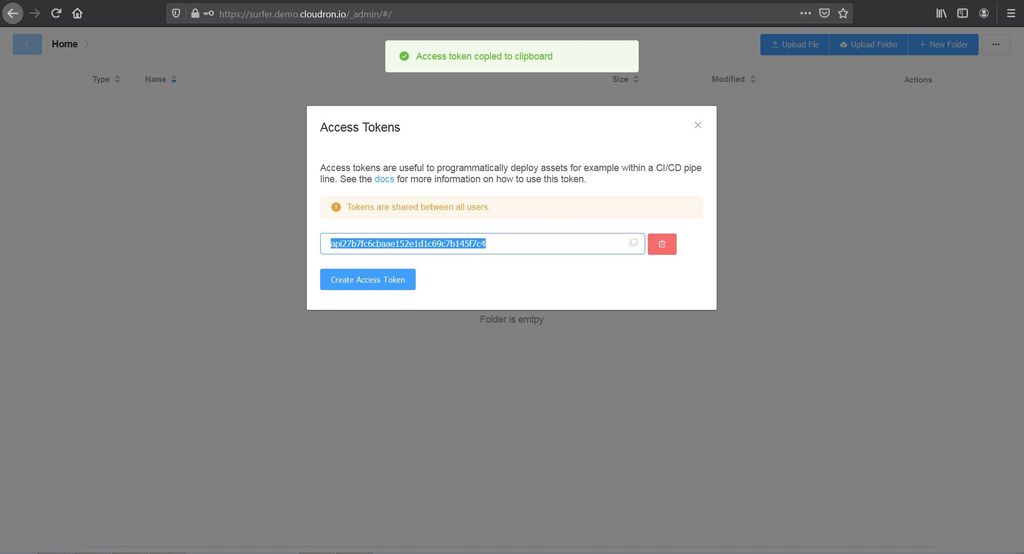
Then, go to your GitLab project --> Settings --> CI / CD. Find the Variables section and click Add Variable:
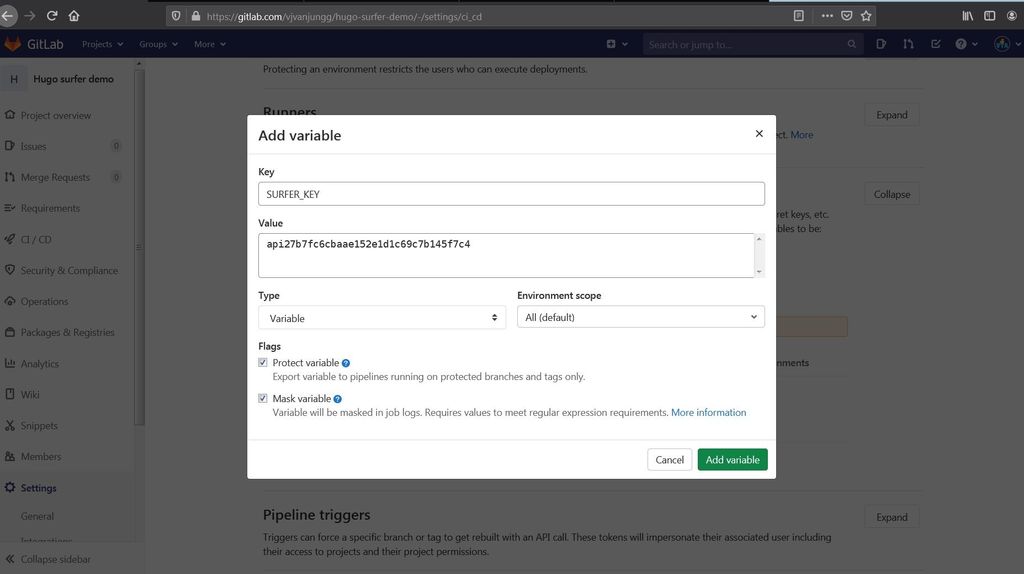
And all you need now is to run the rest of the commands, they are:
git status # just to see the file status not 100% necessary
git add . # the dot means add everything
git commit -m "Push to gitlab" # commit with any note/message you like
git push -u origin main # push local files to remote GitLab project
When you first do git push on your computer, you may be asked to enter your GitLab credentials. And voila, you're done!!
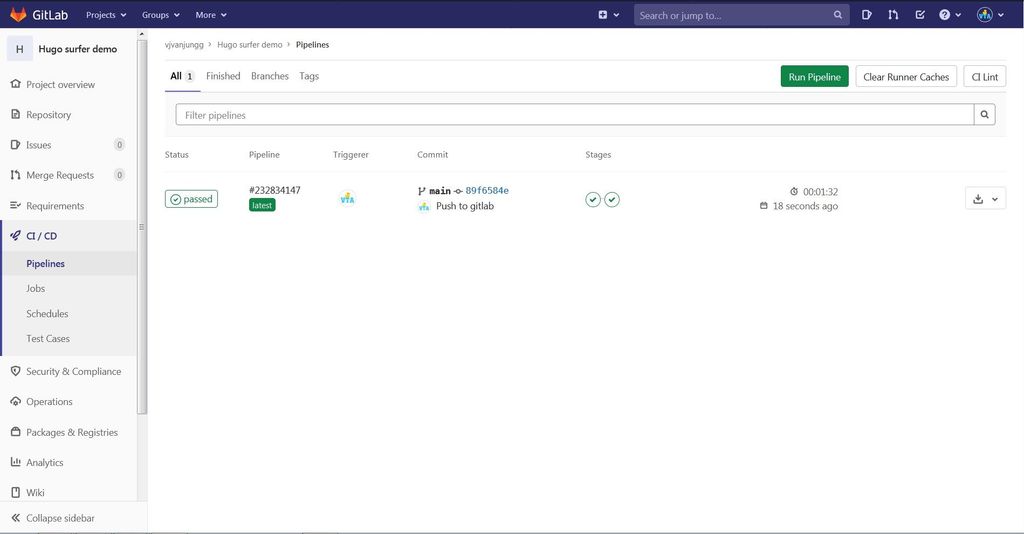
After git push, you can see the magic happens in GitLab. The blue clock means the pipeline is running.
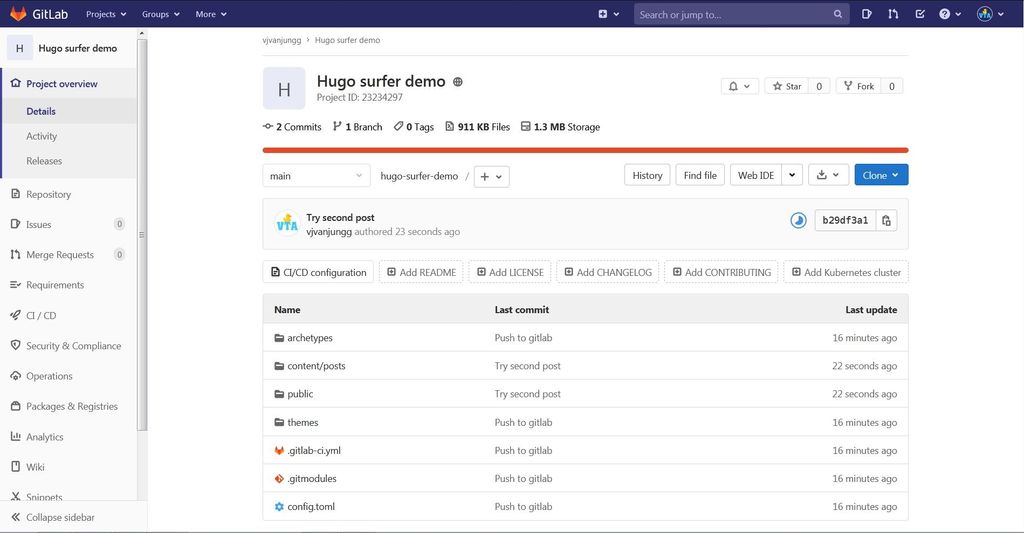
After it succeeds, it will show:
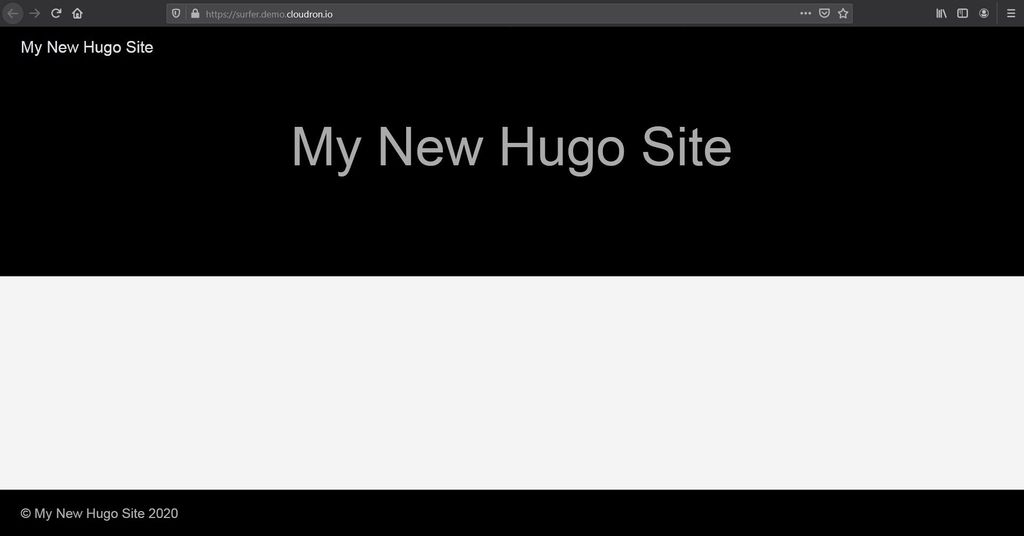
Navigate to your Surfer url, and enjoy your new site!
 I hope it helps! This is the least I can do for a wonderful community that has helped me so much.


